Users, groups, and projects
Role Model
Users with different functional tasks work with the system. Accordingly, the role model of the system provides wide opportunities to configure and restrict access rights. In general, it is formed in terms of administrative and project access rights.
Administrative Access Rights
Administrative access rights define user actions (privileges) within the organization. For example: managing users, groups and engines, creating rules and requirements, changing settings at the organization level, etc. Four roles are defined for administrative access rights: Default, Viewer, Manager and Admin.
Note: Each subsequent role in this list includes the full set of privileges of the previous role.
Default — The minimum administrative rights in the system. As long as the Default is not assigned to any project, he or she cannot perform any productive actions in the system. Once added to the project, a user with the Default role gets the privileges defined by the project access rights assigned to him or her, see the Project Access Rights section.
Viewer — can view company settings (users, groups, rules, requirements, engines, integrations, etc.) without the ability to edit them.
Manager — can change system settings within the company, except for creating projects and assigning project roles to users.
Admin — This role provides the ability to create new projects and assign project roles to users. A user with the Administrator role has the maximum possible access rights within the administrative part of the role model, as well as access to all projects, even if there is no project role.
Administrative user roles are displayed on the Users tab of the Settings page.

Project Access Rights
Project access rights, as the name suggests, allow you to regulate the user's actions within the project(s). For example: start scans, project settings, profiles, etc. Usually project roles are assigned when a user is added to a project, but it is also possible to change them. A user can be added to a project with one of the following roles:
Viewer — has read-only access. Such a user can view all information relevant to the project: project and profile settings, scan results, test cases, rules and requirements, etc.
Engineer — A user who is actively working with the system and applications, usually a developer or a security engineer. This user can run scans, work with the results, record test cases, etc. Engineer has full access to the project, except for the ability to add new users, configure integrations with third-party tools and delete the project.
Admin — In addition to the permissions available to users with the Engineer project role, the project Admin can perform project settings, including integration configuration and adding users. Admin can delete the project if necessary.
Note: Each subsequent role in this list includes the full set of privileges of the previous role.
You can assign project roles to users on the Projects tab of the Settings page. For more information, see the Adding users (user groups) to a project section.
User Information
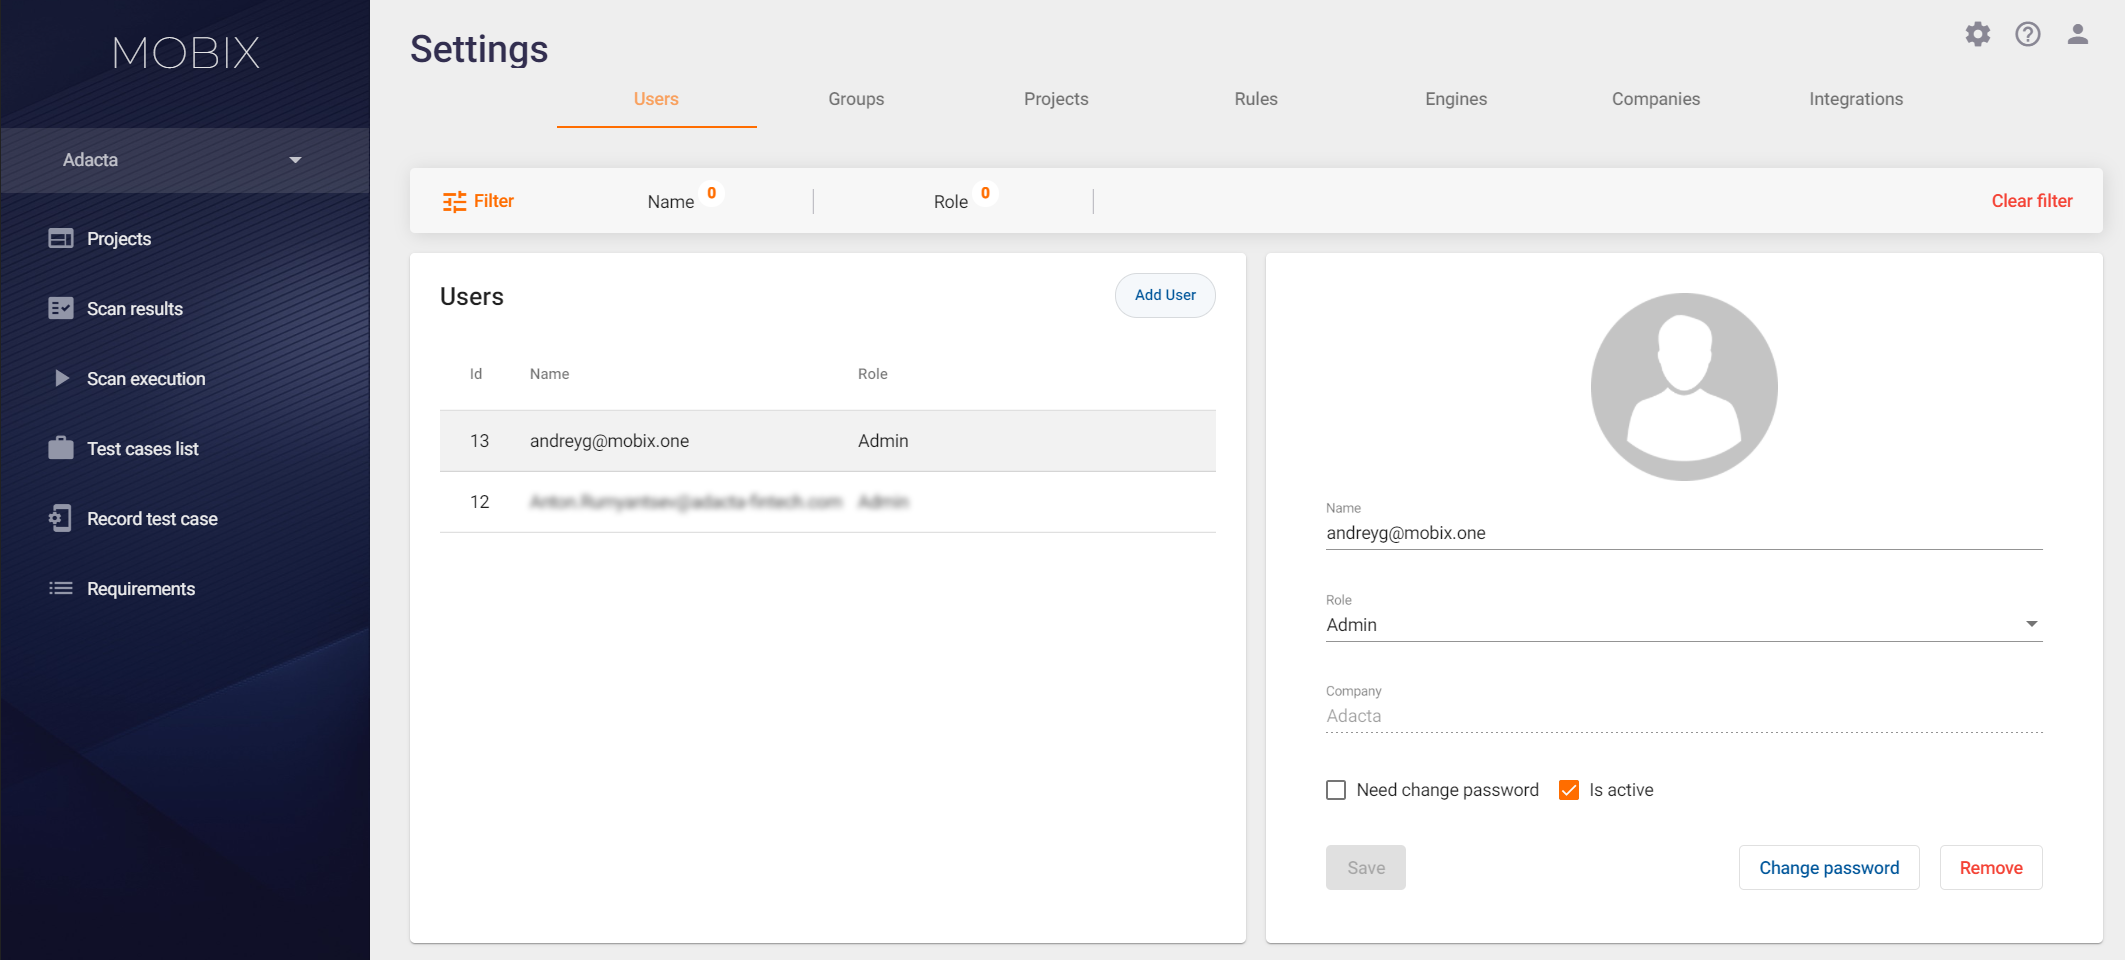
Click the ![]() icon in the upper right corner to go to the Settings page. When you go to Settings, the Users tab opens.
icon in the upper right corner to go to the Settings page. When you go to Settings, the Users tab opens.
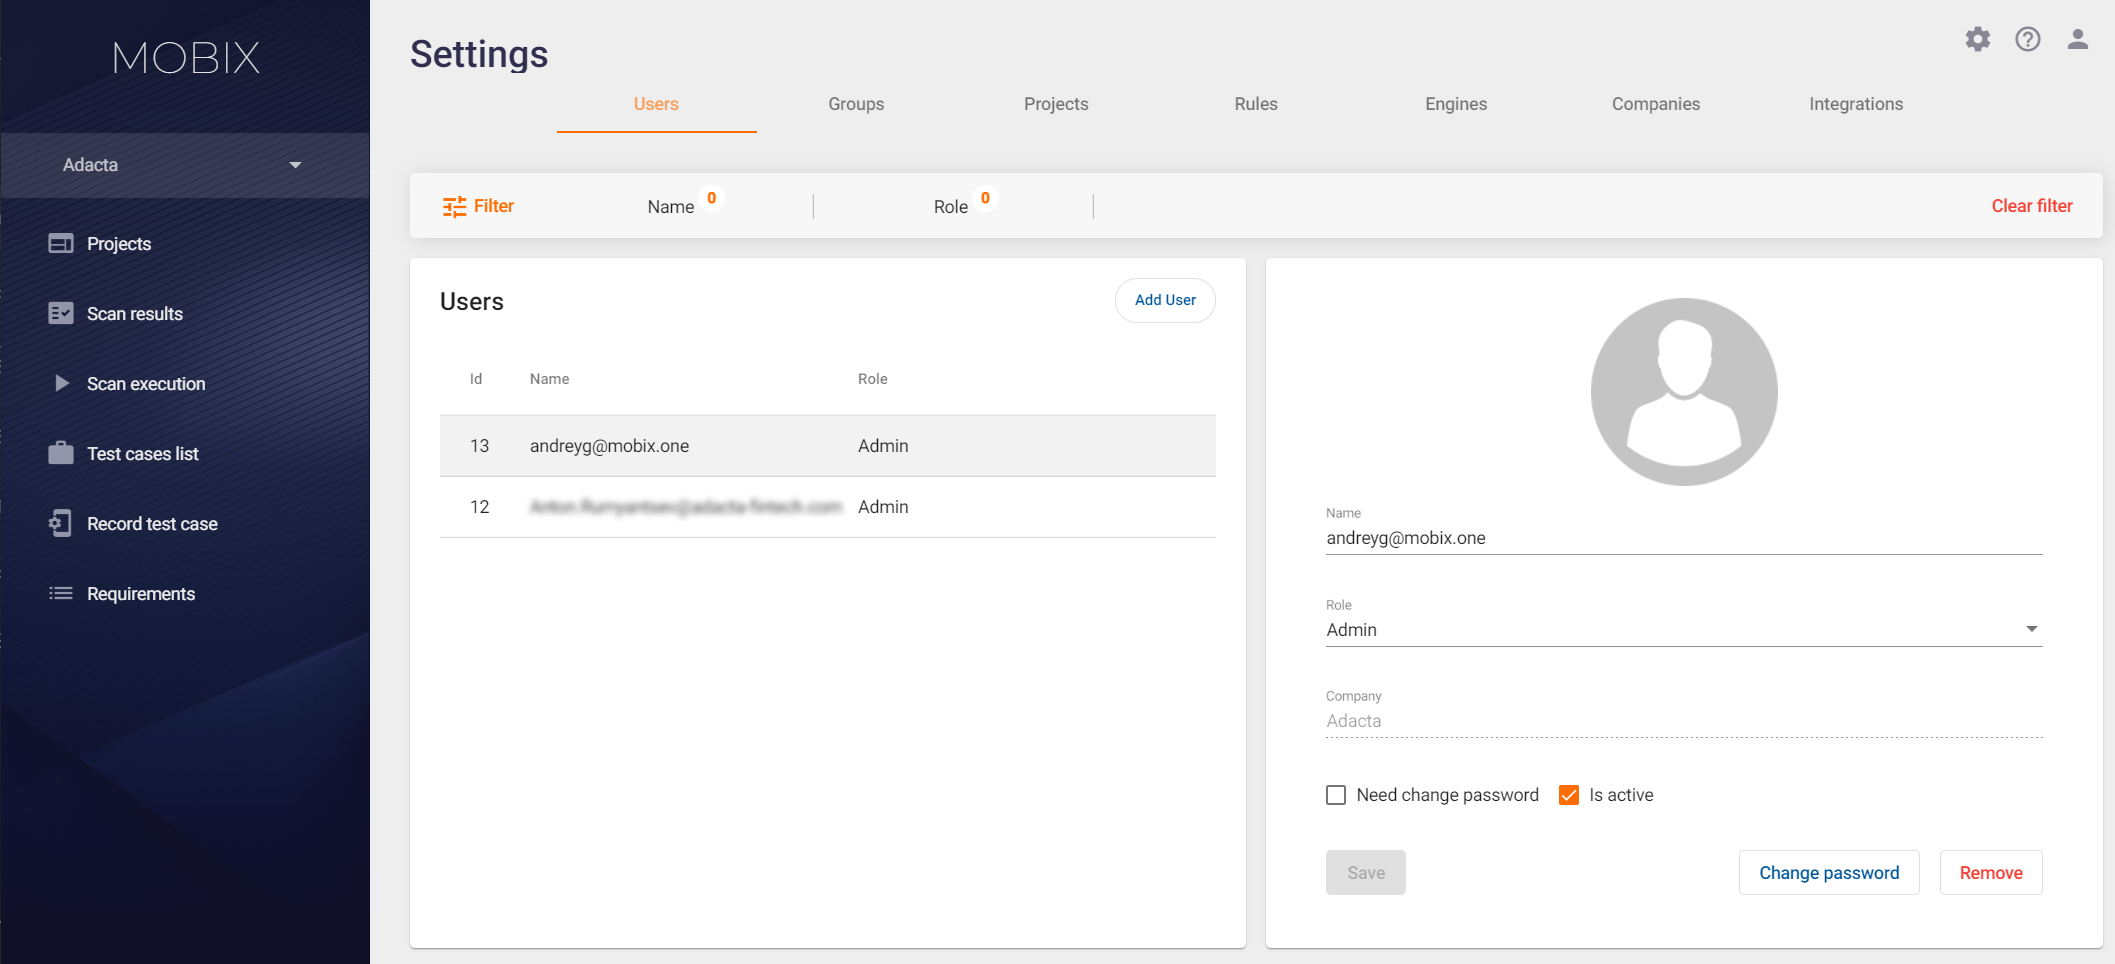
On the left is a list of users with brief descriptions:
- Id — The digital user ID.
- Name — User login in the system (in e-mail address format).
- Role —The administrative user role.
When you click the user row, detailed information about the user appears on the right side.
Admin can add, edit and delete users.
Adding a User
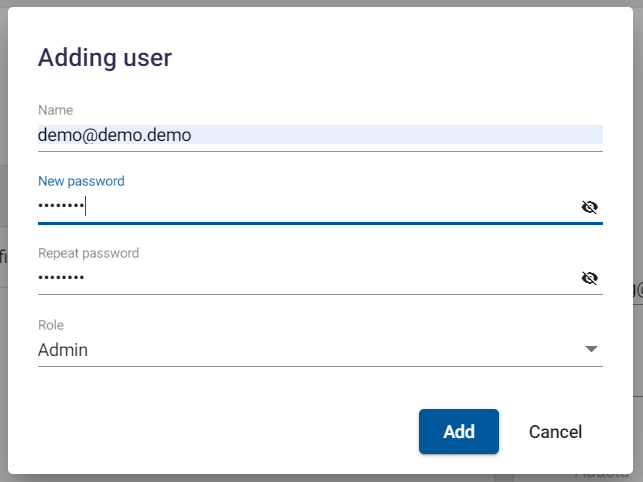
| ! | To add a user to the system, the administrative role of Manager or Admin is required. |
To add a new user to the system, click the Add User button on the Users tab.
In the Adding user window that appears, enter the following information:
- Name — User login in the system (in e-mail address format).
- Enter the Password twice.
- Choose the administrative Role of the user.
Editing a User Profile
To edit a user's profile, click the user row on the left side of the Users tab. The right side of the tab displays detailed information about the user.
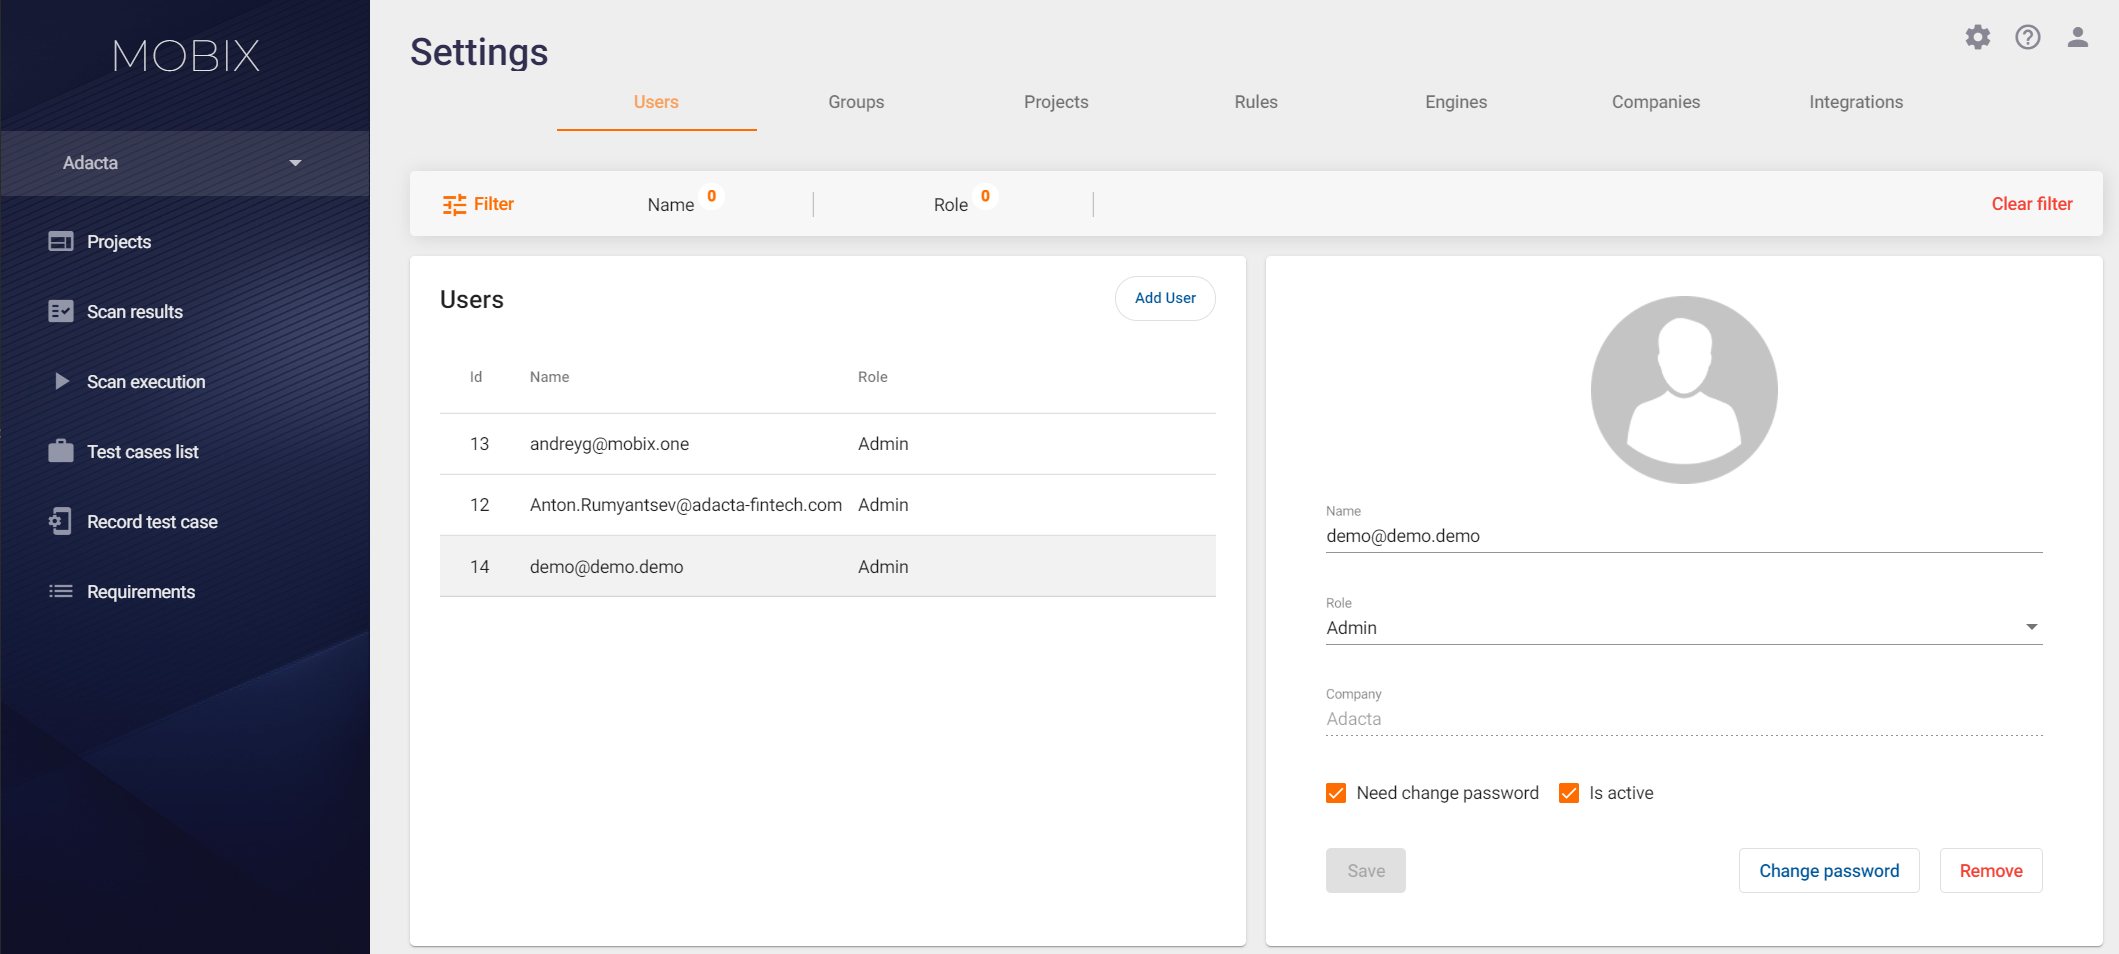
You can change the following parameters:
- Name (in email address format).
- Administrative user Role in the system (Default/Viewer/Manager/Admin).
Besides, in this window Admin can initiate a change of the user's password (the corresponding window will be displayed the next time the user logs in), as well as change his status (Is active/Is inactive). If the Is active box is unchecked, the user will not be able to log in.
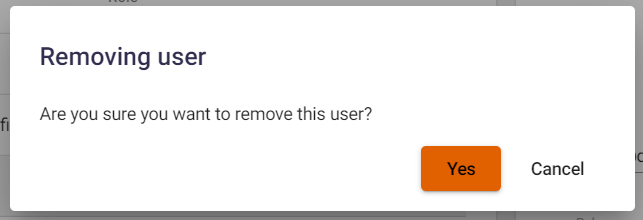
Deleting a User
To delete a user, click the Remove button in the lower right corner and confirm your action in the window that appears.
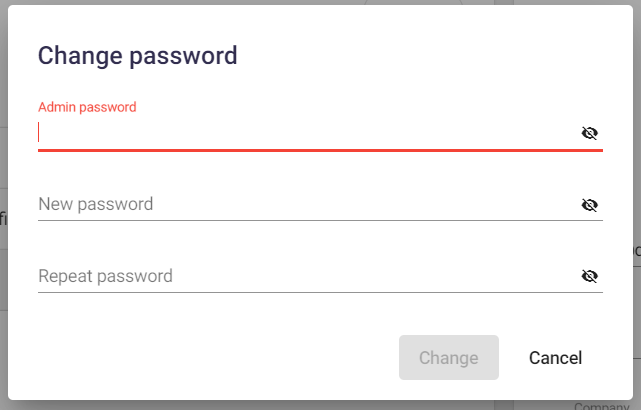
Changing a User Password
To change the user's password, click the Change password button on the user's profile. In the Change Password window that appears, enter the password of Admin changing the user's password and the user's new password.
User Groups
In the system, you can group users to easily add them to the project, as well as to facilitate the delimitation of access rights.
For example, you can create an Administrators group and add to it those users who need administrative rights.
Note: The role model of the system is based on the principle of highest privilege. Let's illustrate it with a small example. If a user with the administrative role of Viewer is added to the Administrators group, he or she will have all the rights of AdminAdmin.
Note: When assigning roles to users, it is important to clearly understand the difference between administrative and project access rights. Besides, the user cannot create groups or add users to groups with privileges higher than his/her role. For example, Manager can create groups with privileges no higher than Manager, and cannot add/remove users to Admin groups.
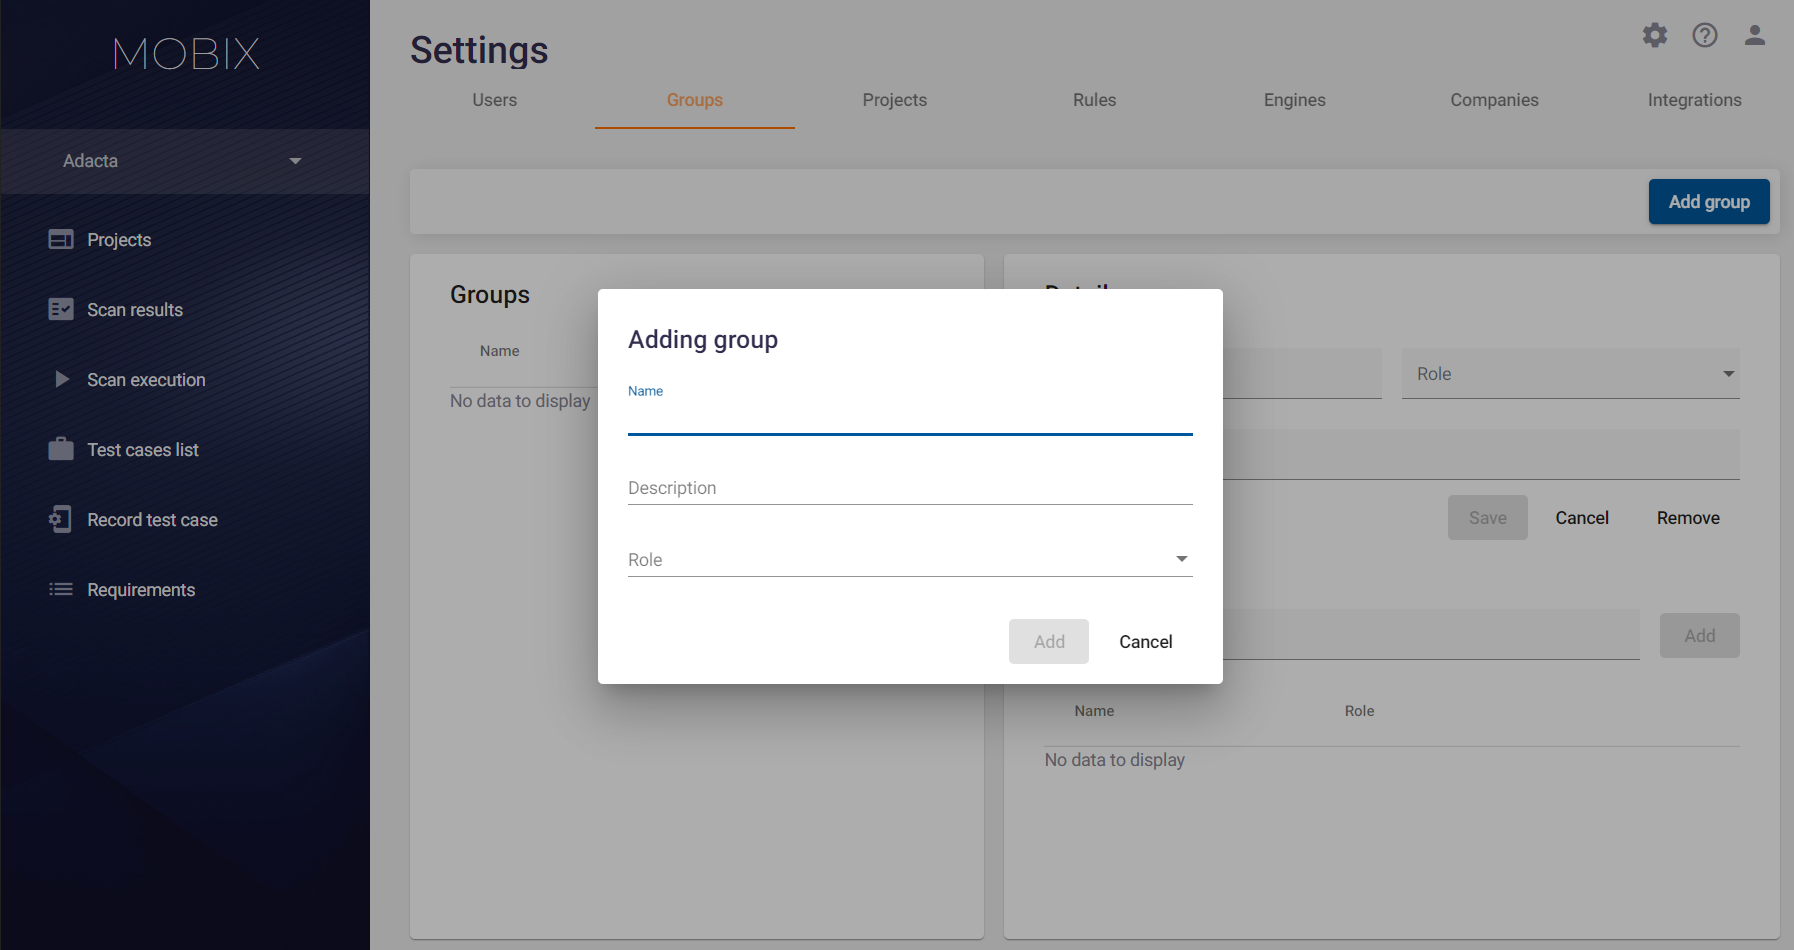
Creating/Deleting User Groups
| ! | To create or delete a user group, you need the administrative role of Admin or Manager. |
To create a user group, click the  icon in the upper right corner. Go to the Groups tab and click the Add Group button. Specify the Name and Description of the group, and select an administrative role for it. For more information on administrative roles, see the Administrative Access Rights section above.
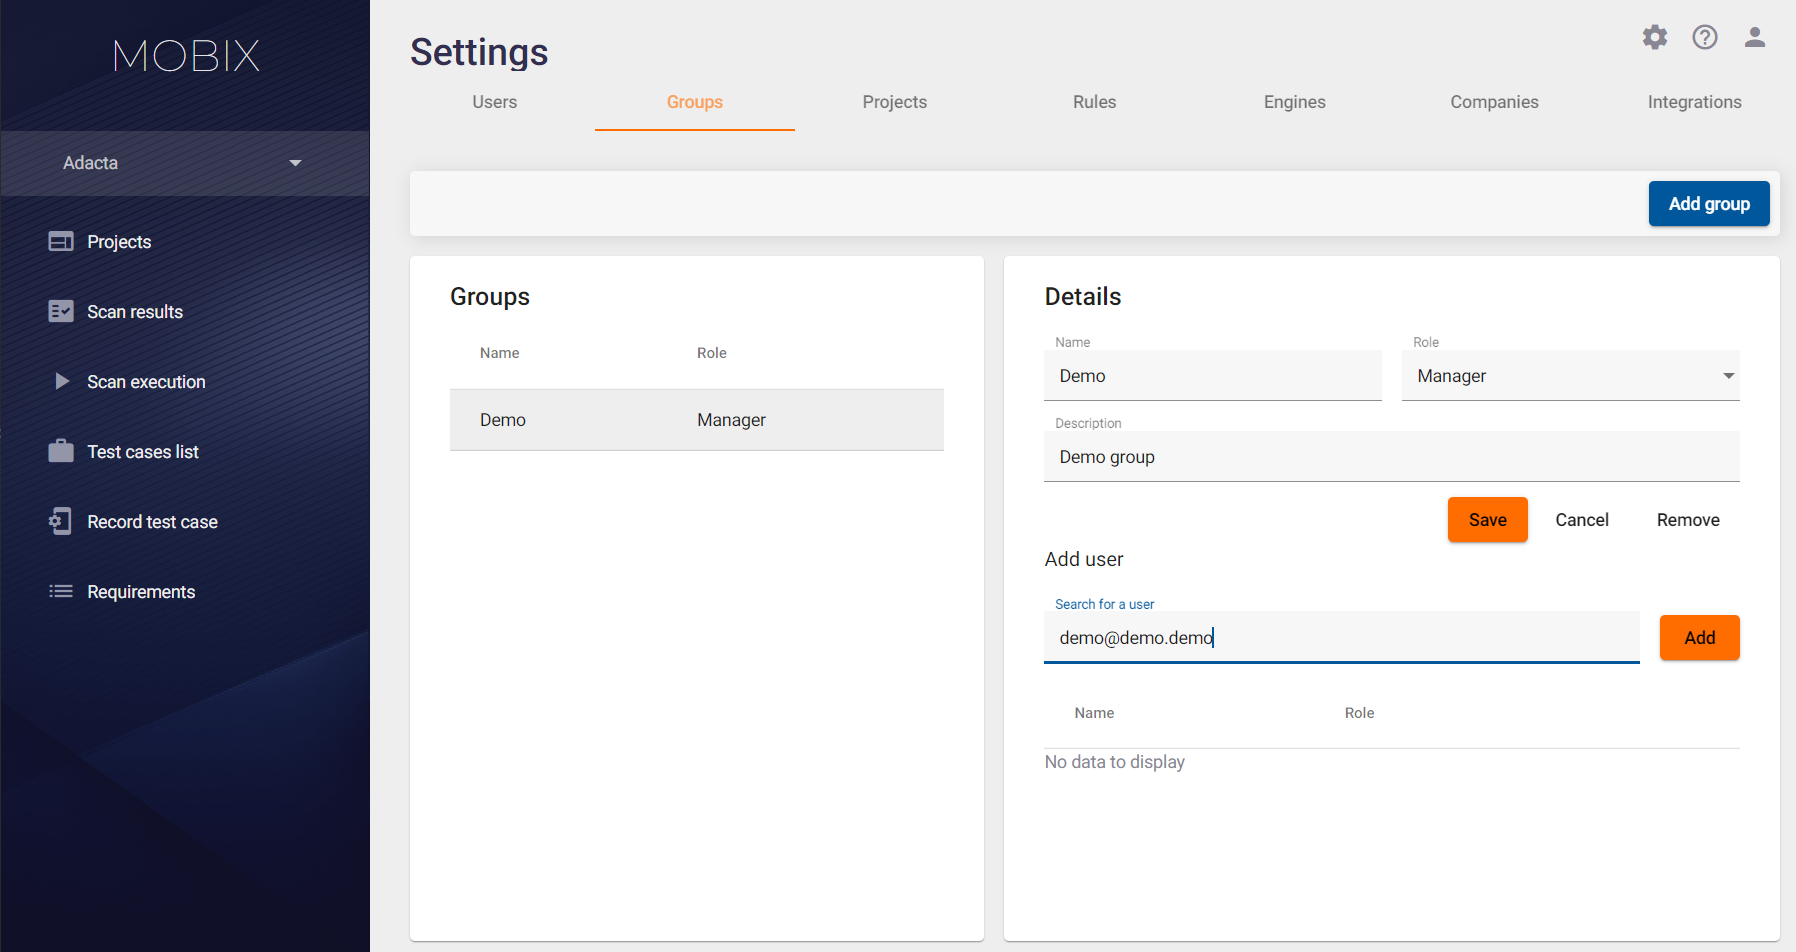
You also can delete a user group on the Groups tab. Select the group on the left side in the Groups area and click the Remove button on the right side in the Details area.
Adding/Deleting a User to/from a Group
To add a user to a group, click the icon in the upper right corner. Click the Groups tab. Select the required group on the left side. Find the user using the Search for a user field on the right and click the Add button.
Note: Again, the role model of the system is based on the principle of highest privileges. If a user with the administrative role of Viewer is added to the group with Admin rights, this user will have all the administrative rights of Admin.
To remove a user from a group, click the ![]() icon in the user row on the right.
icon in the user row on the right.
Adding users (user groups) to a project
| ! | To add a user (group of users) to the project, you need the project or administrative role of Admin. For more information on project user roles, see the Project Access Rights section. |
To add a user (group of users) to a project, click the icon in the upper right corner and click the Projects tab.
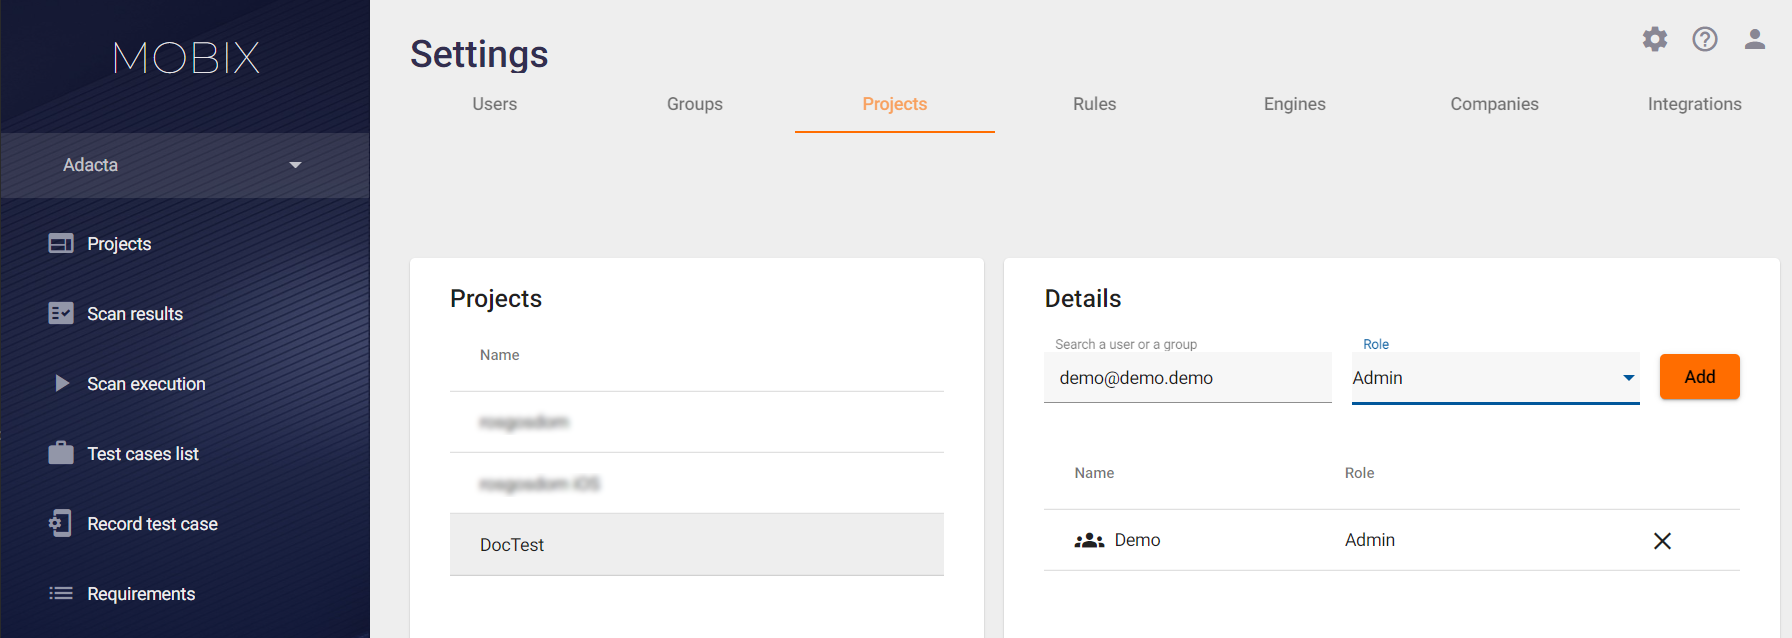
Select a project from the list on the left side of the screen (in the Projects area), find the required user (or group of users) in the Search a user or a group field. Assign the appropriate project role by selecting a value from the Role drop-down list. Click the Add button. For more information on user groups, see the User Groups section above.
The list of users in the project can be viewed on the right side in the Details area of the Projects tab.
Note: When assigning roles to users, it is important to clearly understand the difference between administrative and project access rights. Besides, the user cannot create groups or add users to groups with privileges higher than his/her role. For example, Manager can create groups with privileges no higher than Manager, and cannot add/remove users to Admin groups.