Integration with AppScreener
AppScreener token creation
To integrate with AppScreener, you need a token. The procedure of its creation is described below.
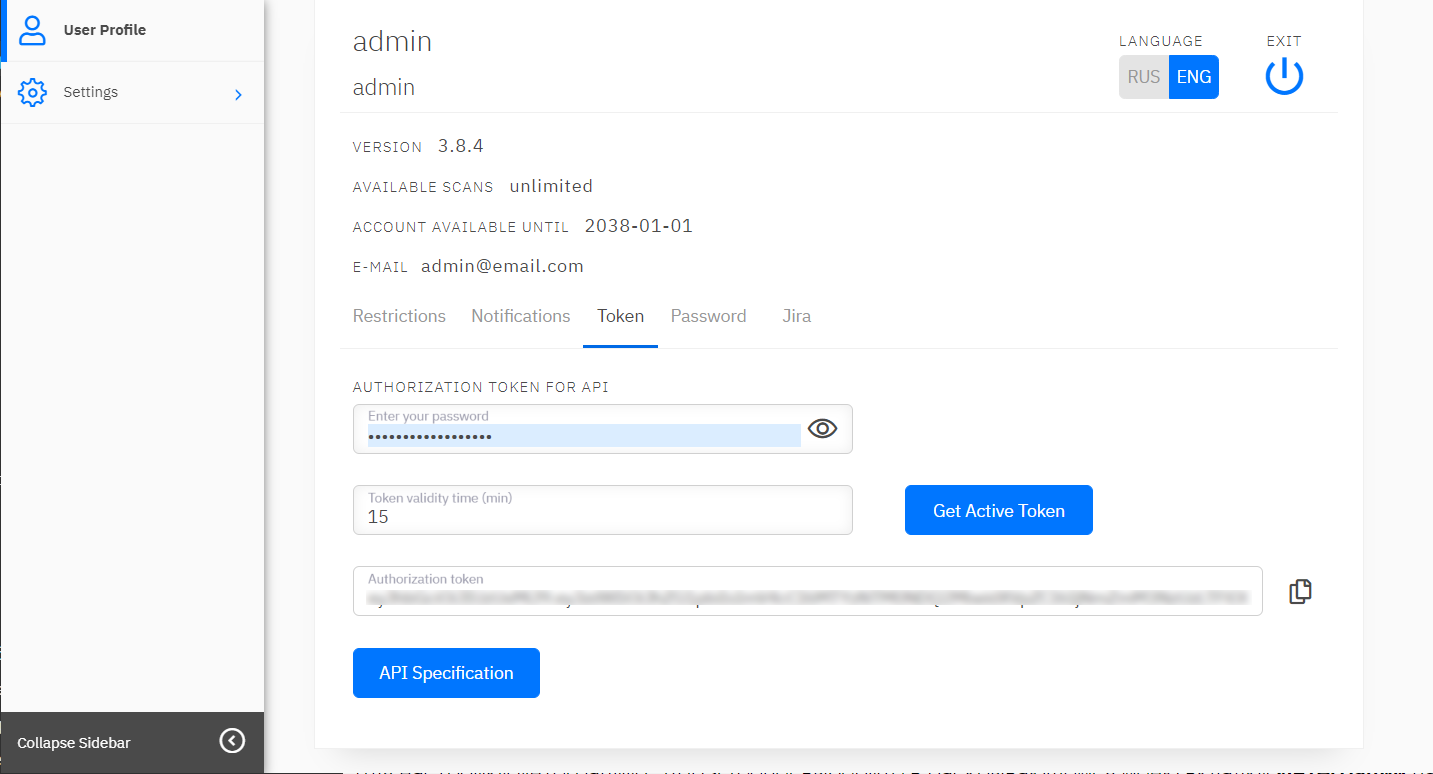
In the AppScreener user interface, go to Profile.

Open the Token tab. Enter the AppScreener Administrator password in the Enter your password field, specify the token validity time in minutes in the Token validity time (min) field and click the button.
Copy the generated token by clicking the ![]() icon.
icon.
Configuring integration with the AppScreener
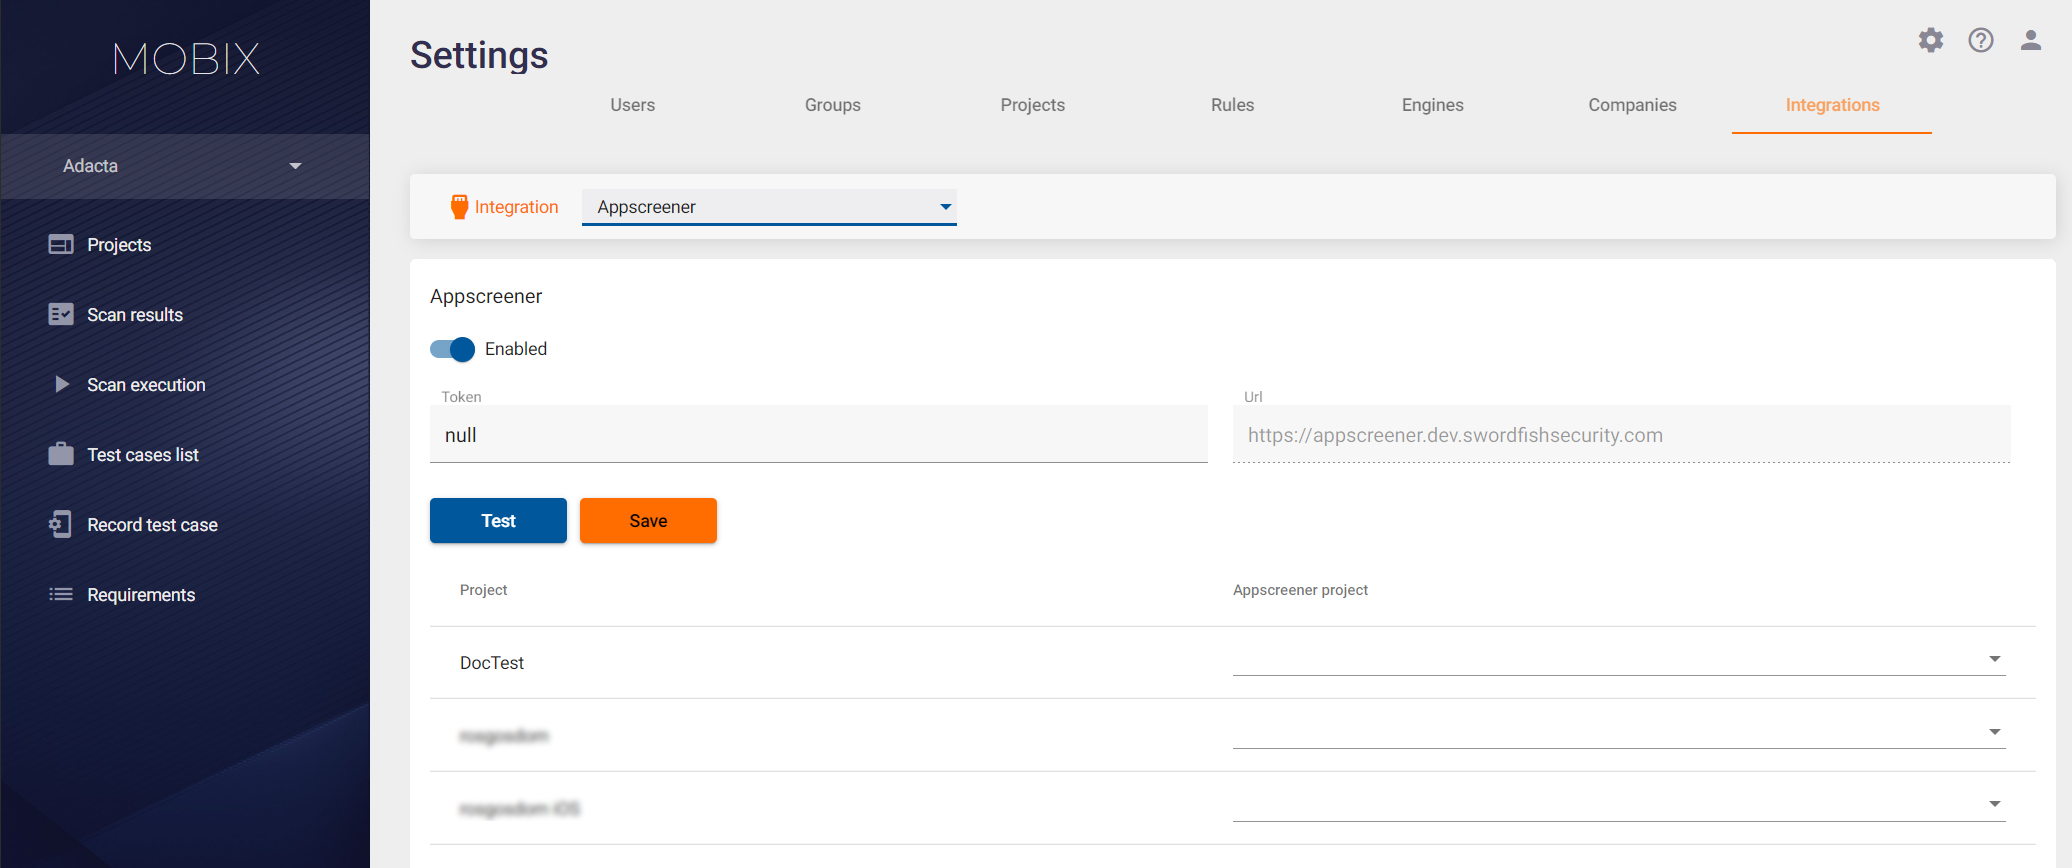
To set up integration with the AppScreener, select the Integrations tab on the Settings page. On this tab, select the AppScreener item. Toggle the selector below to the "Enabled" position.
Paste the integration token in the Token field.
URL is set during system installation and cannot be changed by User or Administrator.
Click the Test button to test connection to the tool. If the connection is successful, a message appears at the top of UI stating that the token is valid. If it is not, an error message appears at the top of UI.
Click the Save button. At the bottom of the page, you will see a table that allows you to specify the correspondences between the Mobix and AppScreener projects. Use the drop-down menus to configure the settings.
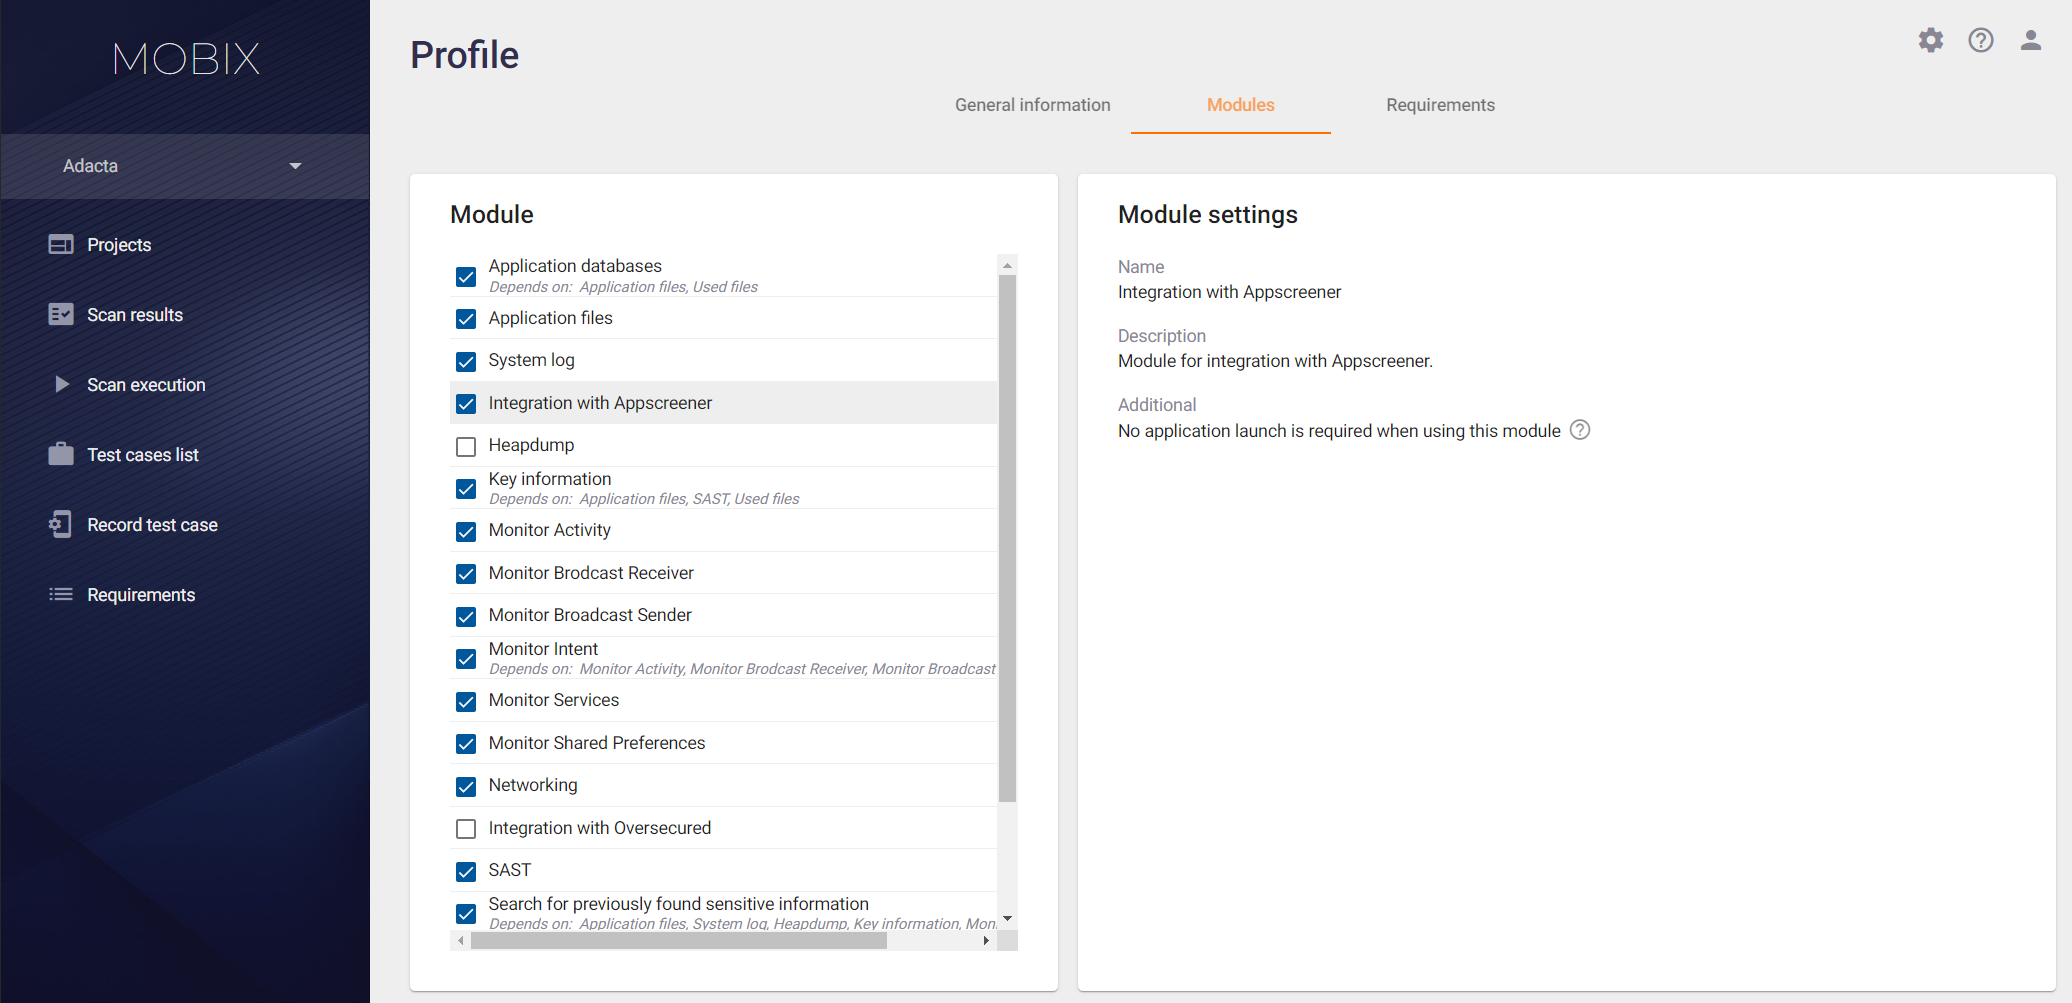
To complete the integration settings, go to the profile of the selected project and activate the AppScreener module on the Modules tab, see Scan Profiles section of the User Guide.
Note: If no correspondence between the Mobix and AppScreener projects was specified when configuring the integration with the tool, a project with the following mask as its name will be created when the scan is executed in AppScreener for the first time:
Company name_project name
All subsequent scans in the Mobix project will be performed in the created AppScreener project, if the corresponding integration is enabled in the Mobix project profile.