Scan Profiles
Click the profile name on the Projects page or on the Profile list page to open the Profile page and get detailed information about the profile. The page provides information about the settings of the scanning modules in this profile. Here you can enable, disable or configure them. You can also view and change the security standards that the application analyzed by this profile is checked to comply with. You can also get information about the number of defects found over the lifetime of the scan profile.

There are three tabs on the Profile page: General information, Modules, Requirements.

Scan Profile Management
Scan profiles are related to projects. The Projects page shows all the projects available in the system and their scan profiles. For each project, a list of its profiles is displayed. On this page you can add a new scan profile for an existing project or view information about existing profiles.
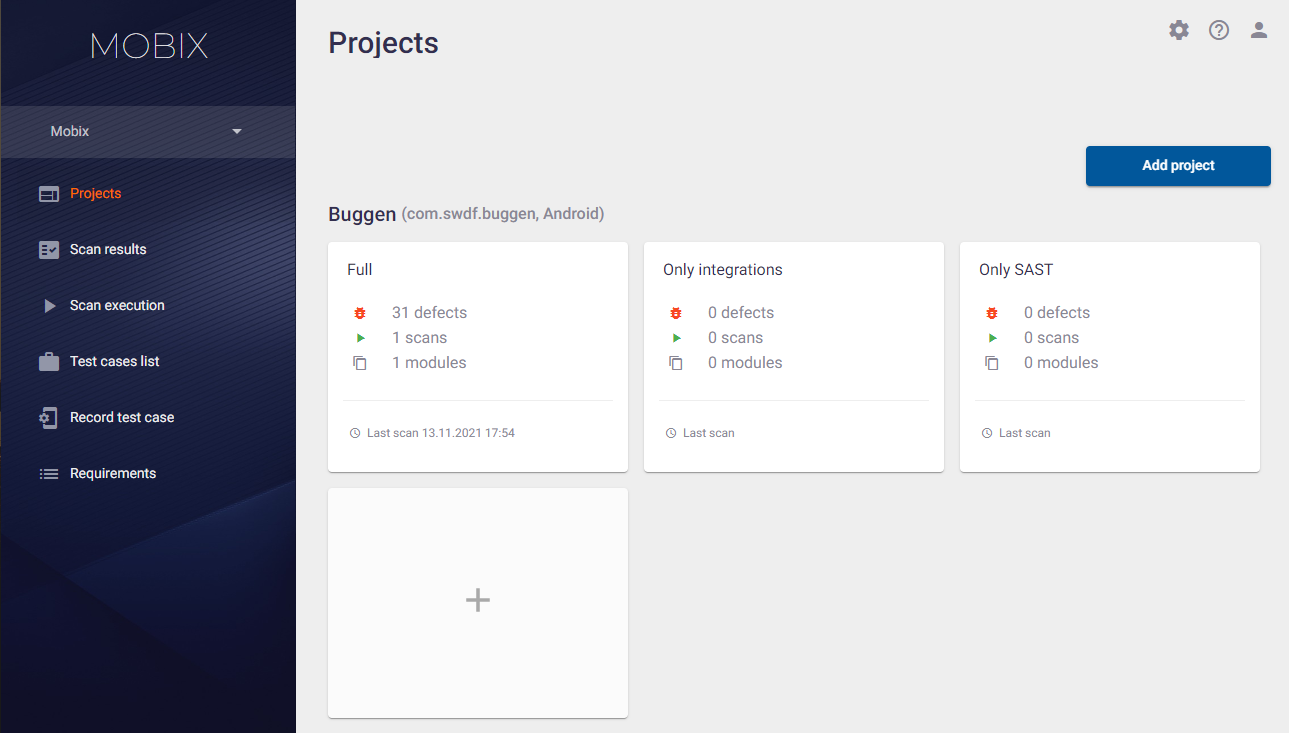
To add a new profile to the project, click the  icon in the empty profile card next to the existing profiles. In the Add profile window that appears, enter the name of the profile and a short description, and then click the Add button in the lower right corner. The newly created profile will appear in the list of project profiles.

To edit or delete a profile, click its name on the Projects page.

The Profile window appears.
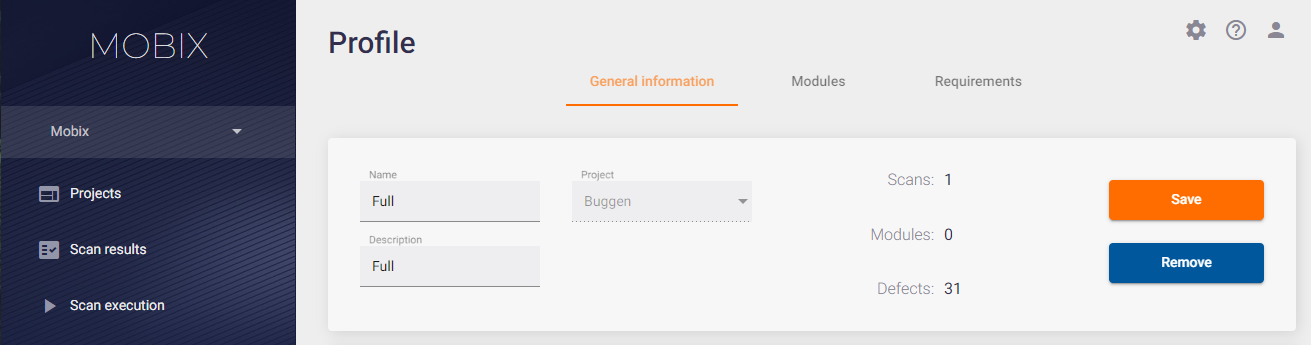
The first tab, General information, provides information about the profile:
- Name.
- Description.
- The project that the profile belongs to.
- Number of scans performed with the profile.
- The number of scan modules that are used in this profile.
- The number of defects found during the lifetime of the profile.
On this tab you can edit the following parameters:
- Name — here you can edit the profile name.
- Change the profile description in the corresponding field.
- In the Project field, select a project from the drop-down list. In this way, the profile along with all its settings can be transferred from one project to another.
After you have updated the profile information, click the Save button on the right.
You can also delete a profile on the General information tab. Click the Remove button on the right and confirm this action by clicking the Yes button in the Removing profile window that appears.

You can add, delete and edit a profile in two ways. Let's consider the second way.
The Projects page displays the project names and the list of profiles for each project. Clicking on the project name opens the Project page with the General information, Profile list, Rules and Access tabs.

On the Profile list tab, you can add a new profile:
To add a new profile to the project, click the Add Profile button.
- In the Add profile window that appears, enter the name of the profile and a short description and click the Add button in the lower right corner of the window. The newly created profile will appear in the list of project profiles.
- Click the profile row in the profile list to change profile information or delete a profile. The Profile page opens. Editing and deleting a profile on the Profile page is described earlier in this section.
Modules
This tab contains settings for modules that collect information about the application for further analysis. This tab allows you to enable or disable a specific module and make the necessary settings.

The system includes nineteen scanning modules. A list of all modules is presented on the Modules tab on the Profile page. In this list, you can select and configure the modules to be enabled when scanning an application with this profile. Further analysis and search for application vulnerabilities will be performed based on the data collected during the scan.
To work effectively with the application it is possible to enable or disable each module and make the necessary settings.
All enabled modules are marked with  , all disabled modules are marked with
  . To change the module status from "enabled" to "disabled" and vice versa, just click the module status icon.
There are a number of specific settings for each module. When you select a module from the list of modules on the left, its settings are displayed on the Module settings tab on the right. You can change and save them by clicking the button at the bottom right.

The settings for each module include:
- Name of the module.
- Description.
- List of modules that affect the operation of this module.
- Module Settings that can be configured (if applicable to this module - some modules do not have configurable settings).
Some modules depend on the results of other modules. This is indicated in the list of modules on the left side by the additional information at the bottom of the module name, see figure below. If all "parent" modules are disabled, the module that depends on them will also be automatically disabled.

Requirements
This tab is for managing the information security standards used by the profile to check the application. The creation and editing of the requirements and standards are described in the Requirements section.
The Requirements page of the main menu lists all the information security standards and their requirements. The application is checked for compliance with these information security requirements. A list of all requirements standards is also available on the Requirements tab of the Profile page. In this list you can select the standards against which the results of testing an application with this profile will be checked. The list of requirements included in the standard is presented on the right.
The system allows to enable or disable information security standard compliance check.
All standards enabled for checking are marked with  , all disabled standards are marked with
  . To change the status of the standard from "enabled" to "disabled" and vice versa, just click the standard status icon.
